Cara Install Hyprland di Nixos

Panduan Install dan konfigurasi Hyprland di Nixos step by step
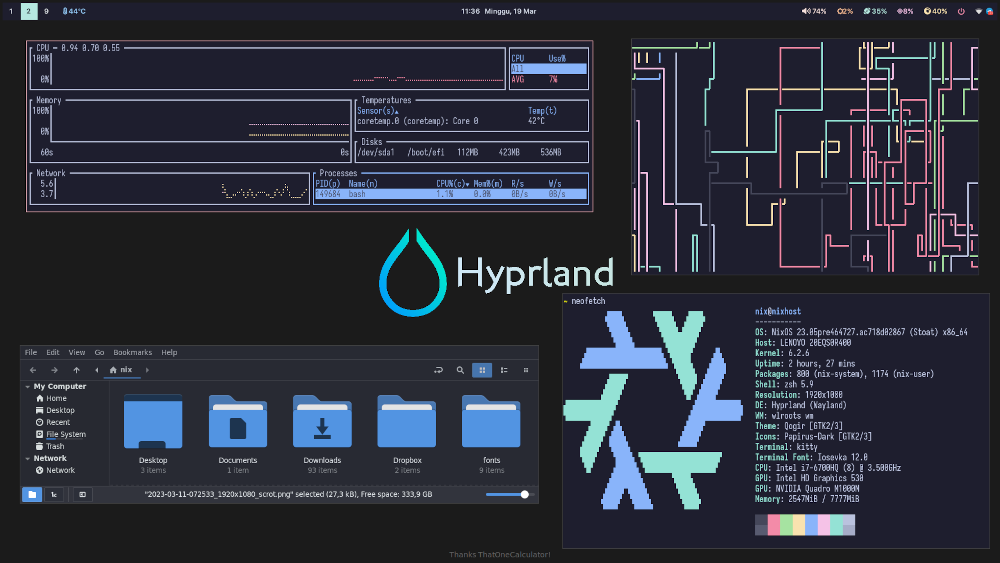
JagoTekno.com - Hyprland merupakan sebuah desktop compositor untuk Wayland.
Singkatnya Hyprland ini sama seperti KDE, Gnome, Xfce, Awesome, dll, tapi hanya menyediakan tampilan saja, tidak include dengan aplikasi.
Hyprland menyajikan sebuah tampilan yang terkesan modern, minimalis dan elegan lengkap dengan beberapa animasi keren untuk setiap window.
Dengan menggunakan kelebihan dari teknologi Wayland, kita bisa merasakan pengalaman penggunakan desktop Linux yang berbeda dan menyenangkan.
Pengetahuan dasar seputar Hyprland, Wayland dan Xorg
Hyprland berjalan di atas Wayland.
Hyprland bisa berjalan tanpa install Sway terlebih dahulu.
Untuk bisa menjalankan Hyprland kita harus mengaktifkan modul Wayland terlebih dahulu.
Kemudian setelah berjalan, kita coba jalankan aplikasi X11 dan berharap aplikasi tersebut bisa berfungsi dengan normal di atas Hyprland.
Jika membandingkan X11 dengan Hyprland akan sangat terasa bedanya, dimana beberapa aplikasi yang biasa kita gunakan mungkin tidak akan berfungsi.
Misalnya LxAppearance, Flameshot, tidak akan berjalan di X11, meskipun bisa terbuka tetapi tidak akan ngefek apa-apa jika kita mencoba mengubah pengaturannya.
Setelah saya menggunakan Hyprland beberapa waktu ini, saya merasakan bahwa X11 lebih mature karena dia sudah mendukung lebih banyak aplikasi, sedangkan Wayland masih belum sempurna.
Tapi meskipun demikian, saya berharap pengembangan aplikasi berbasis Wayland terus dikembangkan.
Thanks to developers.
Cara Install Hyprland di Nixos
Secara dasar, Hyprland bisa diinstall hanya dengan mengikuti tutorial pada wiki.hyprland.org.
Tapi jika anda masih bingung, di sini saya ingin menjelaskan secara lengkap step by step cara install dan setting Hyprland.
Supaya para pemula bisa memahami dan melakukan setting sendiri.
Juga sebagai catatan buat saya pribadi supaya tidak lupa.
Ada 2 cara install Hyprland yang bisa dilakukan.
- Dengan menggunakan Cachix, lalu install untuk keseluruhan system.
- Install Hyprland di Home Manager khusus untuk user tertentu saja.
Install Hyprland melalui Cachix untuk keseluruhan system
- Buka file
configuration.nixlalu tambahkan baris ini
  nix = {
    settings.substituters = ["https://hyprland.cachix.org"];
    settings.trusted-public-keys = ["hyprland.cachix.org-1:a7pgxzMz7+chwVL3/pzj6jIBMioiJM7ypFP8PwtkuGc="];
  };

  environment.systemPackages = with pkgs; [
	gcc
	gnumake
    hyprland
	xdg-desktop-portal-hyprland
	hyprland-share-picker
	hyprland-protocols
    wlogout
    swaylock
    wofi
    swaybg
    wl-clipboard
    clipman
    sway-contrib.grimshot
    slurp
    jq
    waybar
  ];

  xdg.portal = {
    enable = true;
    wlr.enable = true;
    extraPortals = [ pkgs.xdg-desktop-portal-gtk ];
  };

   security.pam.services.swaylock = {
    text = ''
      auth include login
    '';
  };
Setelah itu build system dengan perintah sudo nixos-rebuild switch.
Pastikan tidak terdapat baris ini pada file shell rc (.bashrc, .zshrc).
export XDG_RUNTIME_DIR=~/.tmp/xdgKarena fungsi yank pada vim tidak akan berfungsi normal.
- Buat file konfigurasi Hyprland di
/home/username/.config/hypr/hyprland.conf. Berikut konfigurasi yang saya gunakan.
monitor=eDP-1,1920x1080@60,0x0,1

exec-once = dbus-update-activation-environment --systemd WAYLAND_DISPLAY XDG_CURRENT_DESKTOP
exec-once = systemctl --user import-environment WAYLAND_DISPLAY XDG_CURRENT_DESKTOP
exec-once = sh ~/.scripts/customwp.sh
exec-once = nm-applet --indicator


#exec-once = waybar
exec-once = sleep 1 && waybar && mako && nm-applet --indicator &
#exec-once = eww daemon && eww open bar
exec-once = wl-paste -t text --watch clipman store --no-persist


# See https://wiki.hyprland.org/Configuring/Keywords/ for more

# Execute your favorite apps at launch
# exec-once = waybar & hyprpaper & firefox

# Source a file (multi-file configs)
# source = ~/.config/hypr/myColors.conf

# Some default env vars.
#env = XCURSOR_SIZE,24

# For all categories, see https://wiki.hyprland.org/Configuring/Variables/
input {
    kb_layout = us
    kb_variant =
    kb_model =
    kb_options =
    kb_rules =

    follow_mouse = 1

    repeat_rate=50
    repeat_delay=300

    touchpad {
        disable_while_typing=1
        natural_scroll=0
        clickfinger_behavior=1
        middle_button_emulation=0
        tap-to-click=1
      }

    sensitivity = 0 # -1.0 - 1.0, 0 means no modification.
}

general {
    # See https://wiki.hyprland.org/Configuring/Variables/ for more

    gaps_in = 5
    gaps_out = 5
    border_size = 1
    col.active_border = rgba(33ccffee) rgba(00ff99ee) 45deg
    col.inactive_border = rgba(595959aa)

    layout = dwindle
}

misc {
    disable_hyprland_logo = true
    disable_splash_rendering = true

    mouse_move_enables_dpms=true
    vfr = true
    hide_cursor_on_touch = true
}

decoration {
    # See https://wiki.hyprland.org/Configuring/Variables/ for more

    rounding = 4
    blur = yes
    blur_size = 3
    blur_passes = 1
    blur_new_optimizations = on

    drop_shadow = yes
    shadow_range = 4
    shadow_render_power = 3
    col.shadow = rgba(1a1a1aee)
}

#animations {
#    enabled = yes
#
#    # Some default animations, see https://wiki.hyprland.org/Configuring/Animations/ for more
#
#    bezier = myBezier, 0.05, 0.9, 0.1, 1.05
#
#    animation = windows, 1, 7, myBezier
#    animation = windowsOut, 1, 7, default, popin 80%
#    animation = border, 1, 10, default
#    animation = borderangle, 1, 8, default
#    animation = fade, 1, 7, default
#    animation = workspaces, 1, 6, default
#}

 animations {
     enabled=1
     bezier=overshot,0.13,0.99,0.29,1.1
     animation=windows,1,4,overshot,slide
     animation=fade,1,10,default
     animation=workspaces,1,8.8,overshot,slide
     animation=border,1,14,default
 }

dwindle {
    # See https://wiki.hyprland.org/Configuring/Dwindle-Layout/ for more
    pseudotile = yes # master switch for pseudotiling. Enabling is bound to mainMod + P in the keybinds section below
    preserve_split = yes # you probably want this

    force_split=0
    no_gaps_when_only = true
}

master {
    # See https://wiki.hyprland.org/Configuring/Master-Layout/ for more
    new_is_master = true

    new_on_top=true
    no_gaps_when_only = true
}

gestures {
    # See https://wiki.hyprland.org/Configuring/Variables/ for more
    workspace_swipe = true
    workspace_swipe_min_speed_to_force=5
}

# Example per-device config
# See https://wiki.hyprland.org/Configuring/Keywords/#executing for more
device:epic mouse V1 {
    sensitivity = -0.5
}

# Example windowrule v1
# windowrule = float, ^(kitty)$
# Example windowrule v2
# windowrulev2 = float,class:^(kitty)$,title:^(kitty)$
# See https://wiki.hyprland.org/Configuring/Window-Rules/ for more


# See https://wiki.hyprland.org/Configuring/Keywords/ for more
$mainMod = SUPER

# Example binds, see https://wiki.hyprland.org/Configuring/Binds/ for more
bind = $mainMod SHIFT, Return, exec, kitty
bind = $mainMod SHIFT, C, killactive,
#bind = $mainMod, M, exit,
bind = $mainMod, E, exec, nemo
bind = $mainMod, V, togglefloating,
bind = $mainMod, D, exec, pkill wofi || wofi --show drun -I
bind = $mainMod, I, pseudo, # dwindle
bind = $mainMod, O, togglesplit, # dwindle


bind = SUPER, P, exec, rofi -show drun
bind = SUPER, W, exec, firefox
#bind = SUPER, Q, exec, ~/.scripts/powermenu.sh
bind = SUPER, Q, exec, pkill wlogout || wlogout


# screenshot
# bind=,Print,exec,grimshot $HOME/Pictures/$(date +'%Y%m%d%H%M%S_1.png') && notify-send 'Screenshot Saved'
# bind=$mainMod SHIFT,Print,exec,grimshot - | wl-copy && notify-send 'Screenshot Copied to Clipboard'
# bind=$mainMod,Print,exec,slurp | grimshot -g - $HOME/Pictures/$(date +'%Y%m%d%H%M%S_1.png') && notify-send 'Screenshot Saved'

bind = ,Print,exec, grimshot save active
bind = SHIFT,Print,exec, grimshot save area
bind = CTRL,Print,exec, grimshot save window

bind=SUPER,F,fullscreen,0

bind = SUPER, h, movefocus, l
bind = SUPER, l, movefocus, r
bind = SUPER, j, movefocus, u
bind = SUPER, k, movefocus, d

bind = SUPER CTRL, left, resizeactive, -20 0
bind = SUPER CTRL, right, resizeactive, 20 0
bind = SUPER CTRL, up, resizeactive, 0 -20
bind = SUPER CTRL, down, resizeactive, 0 20

# Move focus with mainMod + arrow keys
bind = $mainMod, left, movefocus, l
bind = $mainMod, right, movefocus, r
bind = $mainMod, up, movefocus, u
bind = $mainMod, down, movefocus, d

# Switch workspaces with mainMod + [0-9]
bind = $mainMod, 1, workspace, 1
bind = $mainMod, 2, workspace, 2
bind = $mainMod, 3, workspace, 3
bind = $mainMod, 4, workspace, 4
bind = $mainMod, 5, workspace, 5
bind = $mainMod, 6, workspace, 6
bind = $mainMod, 7, workspace, 7
bind = $mainMod, 8, workspace, 8
bind = $mainMod, 9, workspace, 9
bind = $mainMod, 0, workspace, 10

# Move active window to a workspace with mainMod + SHIFT + [0-9]
bind = $mainMod SHIFT, 1, movetoworkspace, 1
bind = $mainMod SHIFT, 2, movetoworkspace, 2
bind = $mainMod SHIFT, 3, movetoworkspace, 3
bind = $mainMod SHIFT, 4, movetoworkspace, 4
bind = $mainMod SHIFT, 5, movetoworkspace, 5
bind = $mainMod SHIFT, 6, movetoworkspace, 6
bind = $mainMod SHIFT, 7, movetoworkspace, 7
bind = $mainMod SHIFT, 8, movetoworkspace, 8
bind = $mainMod SHIFT, 9, movetoworkspace, 9
bind = $mainMod SHIFT, 0, movetoworkspace, 10

# Scroll through existing workspaces with mainMod + scroll
bind = $mainMod, mouse_down, workspace, e+1
bind = $mainMod, mouse_up, workspace, e-1

# Move/resize windows with mainMod + LMB/RMB and dragging
bindm = $mainMod, mouse:272, movewindow
bindm = $mainMod, mouse:273, resizewindow


bind=,XF86MonBrightnessUp,exec, light -A 2
bind=,XF86MonBrightnessDown,exec, light -U 2

bind=,XF86AudioRaiseVolume,exec,pamixer -i 5
bind=,XF86AudioLowerVolume,exec,pamixer -d 5
- Membuat konfigurasi custom Waybar yang keren dan fungsional. Letakkan konfigurasi waybar ini pada
/home/username/.config/waybar/config
[
{
"backlight": {
"device": "intel_backlight",
"format": "{icon} {percent}%",
"format-icons": [
"",
"",
"",
""
],
"on-scroll-down": "light -U 5",
"on-scroll-up": "light -A 5",
"scroll-step": 2
},
"battery": {
"format": "{icon} {capacity}%",
"format-charging": " {capacity}%",
"format-full": "{icon} {capacity}%",
"format-icons": [
"",
"",
"",
"",
"",
"",
"",
"",
""
],
"interval": 10,
"states": {
"critical": 10,
"warning": 20
},
"tooltip": false
},
"clock": {
"format": "{:%I:%M %p %A, %d %b }",
"interval": 1,
"tooltip": true
},
"cpu": {
"format": " {usage}%",
"interval": 1
},
"custom/cava-internal": {
"exec": "sleep 1s && cava-internal",
"tooltip": false
},
"custom/launcher": {
"format": " ",
"on-click": "pkill rofi || ~/.config/rofi/launcher.sh",
"tooltip": false
},
"custom/powermenu": {
"format": "",
"on-click": "pkill rofi || ~/.scripts/powermenu.sh",
"tooltip": false
},
"custom/uptime": {
"exec": "uptime | awk '{print $3 }' | sed 's/,/ /'",
"format": " {}",
"interval": 1,
"tooltip": false
},
"custom/wall": {
"format": " ﴔ ",
"on-click": "wallpaper_random",
"on-click-middle": "default_wall",
"on-click-right": "killall dynamic_wallpaper || dynamic_wallpaper &",
"tooltip": false
},
"height": 20,
"idle_inhibitor": {
"format": "{icon}",
"format-icons": {
"activated": "",
"deactivated": ""
},
"tooltip": false
},
"layer": "top",
"memory": {
"format": " {percentage}%",
"interval": 1,
"states": {
"warning": 85
}
},
"modules-center": [
"clock"
],
"modules-left": [
"wlr/workspaces",
"temperature",
"custom/uptime"
],
"modules-right": [
"pulseaudio",
"backlight",
"memory",
"cpu",
"battery",
"custom/powermenu",
"tray"
],
"mpd": {
"format": "<span foreground='#bb9af7'></span> {title}",
"format-disconnected": "",
"format-paused": " {title}",
"format-stopped": "<span foreground='#bb9af7'></span>",
"max-length": 25,
"on-click": "mpc --quiet toggle",
"on-click-middle": "kitty --class='ncmpcpp' ncmpcpp ",
"on-click-right": "mpc update; mpc ls | mpc add",
"on-scroll-down": "mpc --quiet next",
"on-scroll-up": "mpc --quiet prev",
"smooth-scrolling-threshold": 5,
"tooltip-format": "{title} - {artist} ({elapsedTime:%M:%S}/{totalTime:%H:%M:%S})"
},
"network": {
"format-disconnected": "說 Disconnected",
"format-ethernet": " {ifname} ({ipaddr})",
"format-linked": "說 {essid} (No IP)",
"format-wifi": "說 {essid}",
"interval": 1,
"tooltip": false
},
"position": "top",
"pulseaudio": {
"format": "{icon} {volume}%",
"format-icons": {
"default": [
"",
"",
""
]
},
"format-muted": "婢 Muted",
"on-click": "pamixer -t",
"scroll-step": 1,
"states": {
"warning": 85
},
"tooltip": false
},
"temperature": {
"format": " {temperatureC}°C",
"tooltip": false
},
"tray": {
"icon-size": 15,
"spacing": 5
},
"wlr/workspaces": {
"format": "{icon}",
"on-click": "activate"
}
}
]
Kemudian masih di folder konfigurasi waybar, buat sebuah file style.css kemudian copy paste style berikut di dalamnya.
* {
             font-family: "SF Pro Display";
             font-size: 10pt;
             font-weight: 600;
             border-radius: 0px;
             transition-property: background-color;
             transition-duration: 0.5s;
           }
           @keyframes blink_red {
             to {
               background-color: rgb(242, 143, 173);
               color: rgb(26, 24, 38);
             }
           }
           .warning, .critical, .urgent {
             animation-name: blink_red;
             animation-duration: 1s;
             animation-timing-function: linear;
             animation-iteration-count: infinite;
             animation-direction: alternate;
           }
           window#waybar {
             background-color: transparent;
           }
           window > box {
             margin-left: 0px;
             margin-right: 0px;
             margin-top: 0px;
             background-color: rgb(30, 30, 46);
           }
     #workspaces {
             padding-left: 0px;
             padding-right: 4px;
           }
     #workspaces button {
             padding-top: 5px;
             padding-bottom: 5px;
             padding-left: 6px;
             padding-right: 6px;
           }
     #workspaces button.active {
             background-color: rgb(181, 232, 224);
             color: rgb(26, 24, 38);
           }
     #workspaces button.urgent {
             color: rgb(26, 24, 38);
           }
     #workspaces button:hover {
             background-color: rgb(248, 189, 150);
             color: rgb(26, 24, 38);
           }
           tooltip {
             background: rgb(48, 45, 65);
           }
           tooltip label {
             color: rgb(217, 224, 238);
           }
     #custom-launcher {
             font-size: 20px;
             padding-left: 8px;
             padding-right: 6px;
             color: #7ebae4;
           }
     #mode, #clock, #memory, #temperature,#cpu,#mpd, #custom-wall, #temperature, #backlight, #pulseaudio, #network, #battery, #custom-powermenu, #custom-cava-internal, #custom-uptime {
             padding-left: 10px;
             padding-right: 10px;
           }
           /* #mode { */
           /*   margin-left: 10px; */
           /*   background-color: rgb(248, 189, 150); */
           /*     color: rgb(26, 24, 38); */
           /* } */
     #custom-uptime {
             color: rgb(245, 194, 231);
           }
     #memory {
             color: rgb(181, 232, 224);
           }
     #cpu {
             color: rgb(245, 194, 231);
           }
     #clock {
             color: rgb(217, 224, 238);
           }
    /* #idle_inhibitor {
             color: rgb(221, 182, 242);
           }*/
     #custom-wall {
             color: rgb(221, 182, 242);
        }
     #temperature {
             color: rgb(150, 205, 251);
           }
     #backlight {
             color: rgb(248, 189, 150);
           }
     #pulseaudio {
             color: rgb(245, 224, 220);
           }
     #network {
             color: #ABE9B3;
           }
     #network.disconnected {
             color: rgb(255, 255, 255);
           }
     #battery.charging, #battery.full, #battery.discharging {
             color: rgb(250, 227, 176);
           }
     #battery.critical:not(.charging) {
             color: rgb(242, 143, 173);
           }
     #custom-powermenu {
             color: rgb(242, 143, 173);
           }
     #tray {
             padding-right: 8px;
             padding-left: 10px;
           }
     #mpd.paused {
             color: #414868;
             font-style: italic;
           }
     #mpd.stopped {
             background: transparent;
           }
     #mpd {
             color: #c0caf5;
           }
     #custom-cava-internal{
             font-family: "Hack Nerd Font" ;
           }
Selesai.
Sekarang silahkan logout / restart system untuk melihat hasilnya.
Untuk launch Hyprland secara manual di shell setelah login, cukup ketik perintah Hyprland.
Install Hyprland melalui Home Manager
Anda bisa menyimpan / install Hyprland melalui Home Manager. Jadi system utama jadi lebih bersih. Caranya sangat mudah.
Pastikan anda sudah install home manager di system anda.
Buka terminal lalu
home-manager editlalu tambahkan baris ini
let
flake-compat = builtins.fetchTarball "https://github.com/edolstra/flake-compat/archive/master.tar.gz";

hyprland = (import flake-compat {
    src = builtins.fetchTarball "https://github.com/hyprwm/Hyprland/releases/download/v0.23.0beta/source-v0.23.0beta.tar.gz";
    }).defaultNix;
in
{
  imports = [
    hyprland.homeManagerModules.default
  ];

  home.packages = with pkgs; [
    wofi swaybg wlsunset wl-clipboard
    slurp sway-contrib.grimshot jq socat
  ];

  wayland.windowManager.hyprland = {
    enable = true;
    extraConfig = ''
    # My HYPRLAND Configuration
    # Silahkan copy konfigurasi Hyprland yang sudah saya tulis di atas setelah baris ini.

monitor=eDP-1,1920x1080@60,0x0,1

exec-once = dbus-update-activation-environment --systemd WAYLAND_DISPLAY XDG_CURRENT_DESKTOP
exec-once = systemctl --user import-environment WAYLAND_DISPLAY XDG_CURRENT_DESKTOP
exec-once = sh ~/.scripts/customwp.sh

        '';

  };

# make stuff work on wayland
  home.sessionVariables = {
    _JAVA_AWT_WM_NONREPARENTING = "1";
    MOZ_ENABLE_WAYLAND = "1";
    QT_QPA_PLATFORM = "wayland";
    QT_WAYLAND_DISABLE_WINDOWDECORATION = "1";
    SDL_VIDEODRIVER = "wayland";
    XDG_SESSION_TYPE = "wayland";
  };


# ENABLE SWAY
  wayland.windowManager.sway = {
    enable = true;
    config = rec {
      #menu = "wofi";
      #terminal = default.terminal.name;
      modifier = "Mod4";
      bars = [];

      gaps = {
        smartBorders = "on";
        outer = 5;
        inner = 5;
      };

      startup = [{command = "dbus-update-activation-environment --systemd WAYLAND_DISPLAY DISPLAY";}];

      input = {
        "type:pointer" = {
          accel_profile = "flat";
          pointer_accel = "0";
        };
        "type:touchpad" = {
          middle_emulation = "enabled";
          natural_scroll = "enabled";
          tap = "enabled";
        };
      };
#      output."*".bg = "~/.config/wallpaper.png fill";
    };

    extraConfig = ''
      exec ${pkgs.xorg.xprop}/bin/xprop -root -f _XWAYLAND_GLOBAL_OUTPUT_SCALE 32c -set _XWAYLAND_GLOBAL_OUTPUT_SCALE 2
      '';

    wrapperFeatures.gtk = true;
  };

}
Jangan lupa melakukan rebuild
home-manager switchUntuk menjalankan Hyprland, silahkan buka ke TTY lalu ketik
Hyprland, dan semoga anda berhasil masuk ke desktop Hyprland.
Di atas adalah copy paste pengaturan saya saat ini.
Fitur Hyprland yang didapatkan saat ini
- Animasi antar window
- Gaps
- Cursor Rate biar lebih cepat
- Screenshot menggunakan grimshot, karena Flameshot tidak bisa
- Floating window
- Resize window
- Tiling window
- Fungsi copy paste / yank di NVIM antar aplikasi menggunakan wl-clipboard
Install Waybar di Home Manager
Untuk install waybar silahkan copy paste bagian ini pada config home manager di atas.
# Konfigurasi Waybar ini akan mengaktifkan fungsi Workspace di Nixos. Cukup dengan menambahkan patch khusus.

{
nixpkgs.overlays = [
    (final: prev: {
      waybar =
        let
          hyprctl = "${pkgs.hyprland}/bin/hyprctl";
          waybarPatchFile = import ./workspace-patch.nix { inherit pkgs hyprctl; };
        in
        prev.waybar.overrideAttrs (oldAttrs: {
          mesonFlags = oldAttrs.mesonFlags ++ [ "-Dexperimental=true" ];
          patches = (oldAttrs.patches or [ ]) ++ [ waybarPatchFile ];
        });
    })
  ];

programs.waybar = {
    enable = true;
    systemd = {
        enable = false;
        target = "graphical-session.target";
      };
    style = ''
    /* Copy paste style waybar yang sudah saya tulis di atas setelah baris ini. */

    '';

    settings = [{
        #Copy paste file config Waybar yang sudah saya tulis diatas setelah baris ini.

      }];
  };
}
Kemudian, karena pengaturan saya saat ini ternyata waybar tidak bisa mengaktifkan Workspace, jadi saya harus mencari cara supaya fitur ini aktif. Untungnya bisa diaktifkan melalui Patch.
Silahkan buat sebuah file bernama workspace-patch.nix yang disimpan di dalam folder ~/.config/home-manager/waybar/workspace-patch.nix kemudian isi dengan kode overlay berikut :
{ pkgs ? null, hyprctl ? null, ... }:
pkgs.writeTextFile {
  name = "waybar-hyprctl.diff";
  text = ''
    diff --git a/src/modules/wlr/workspace_manager.cpp b/src/modules/wlr/workspace_manager.cpp
    index da83cb7..4c33ac3 100644
    --- a/src/modules/wlr/workspace_manager.cpp
    +++ b/src/modules/wlr/workspace_manager.cpp
    @@ -450,7 +450,8 @@ auto Workspace::handle_clicked(GdkEventButton *bt) -> bool {
       if (action.empty())
         return true;
       else if (action == "activate") {
    -    zext_workspace_handle_v1_activate(workspace_handle_);
    +    const std::string command = "${hyprctl} dispatch workspace " + name_;
    +       system(command.c_str());
       } else if (action == "close") {
         zext_workspace_handle_v1_remove(workspace_handle_);
       } else {
  '';
}
Setelah itu rebuild lagi home-manager, dan semoga sekarang sudah bisa mengaktifkan waybar dengan sempurna.
Fitur waybar yang diinginkan
- Workspace indicator
- Temperature
- Tanggal dan jam
- Volume
- Brightness
- Indicator Ram
- Indicator CPU
- Indicator Baterai
- Clickable custom power menu
- Tray Icon
- Indicator uptime
Membuat Hyprland autostart
Untuk menggunakan hyprland sebagai default desktop dan autostart saat berada di tty, bisa menggunakan GDM Wayland, atau bisa juga menggunakan Greetd. Saya memilih menggunakan Greetd + TUI Greet.
Silahkan copy baris ini pada file configuration.nix
Mengaktifkan GreetD
services.greetd = {
  enable = true;
  settings = rec {
    initial_session = {
      command = "Hyprland";
      user = "usernamekamu";
    };
    default_session = initial_session;
  };
};
Mengaktifkan GreetD + TUIGreet
Buat file di luar configuration.nix. /etc/nixos/greetd/default.nix kemudian isi dengan baris berikut.
{ pkgs, lib, ... }:

let
  swayRun = pkgs.writeShellScript "sway-run" ''
   # export XDG_SESSION_TYPE=wayland
   # export XDG_SESSION_DESKTOP=Hyprland
   # export XDG_CURRENT_DESKTOP=Hyprland
   # systemctl --user import-environment WAYLAND_DISPLAY XDG_CURRENT_DESKTOP

      dbus-update-activation-environment --systemd DISPLAY WAYLAND_DISPLAY HYPRLAND_INSTANCE_SIGNATURE XDG_CURRENT_DESKTOP SWAYSOCK XDG_CURRENT_SESSION

#    systemd-run --user --scope --collect --quiet --unit=sway systemd-cat --identifier=sway ${pkgs.sway}/bin/sway $@
    systemd-run --user --scope --collect --quiet --unit=sway systemd-cat --identifier=sway ${pkgs.sway}/bin/sway Hyprland
  '';
in
{
  services.greetd = {
    enable = true;
    restart = false;
    settings = {
      default_session = {
        #command = "${lib.makeBinPath [pkgs.greetd.tuigreet] }/tuigreet --time --cmd ${swayRun}";
        command = "${lib.makeBinPath [pkgs.greetd.tuigreet] }/tuigreet --time --cmd Hyprland";
        user = "nix";
      };
      initial_session = {
        command = "${swayRun}";
        user = "nix";
      };
    };
  };

  environment.etc."greetd/environments".text = ''
  Hyprland
  sway
  awesome
  '';
}
Kemudian pada file configuration.nix tambahkan baris ini untuk memanggil file di atas untuk dieksekusi.
imports =
    [ # Include the results of the hardware scan.
      ./hardware-configuration.nix
      ./greetd/default.nix
    ];
Lalu rebuild nixos-rebuild switch
Sekarang semoga anda sudah bisa menjalankan Hyprland melalui Nixos anda.
Semoga bermanfaat.
Rafi
- 15 year+ of Linux user.
- 5 years+ blogger and web developer.
Jika artikel yang dibuatnya ternyata bermanfaat, support dengan cara