Cara Membuat Tampilan Grid Layout Theme Generatepress Gratis Tanpa Plugin

JagoTekno.com - Jika anda membuat website menggunakan Wordpress, anda harus mengetahui salah satu theme terbaik yaitu GeneratePress.
Theme ini sangat simple, dan bisa dicustomisasi untuk hampir segala jenis website atau blog yang ingin dibuat.
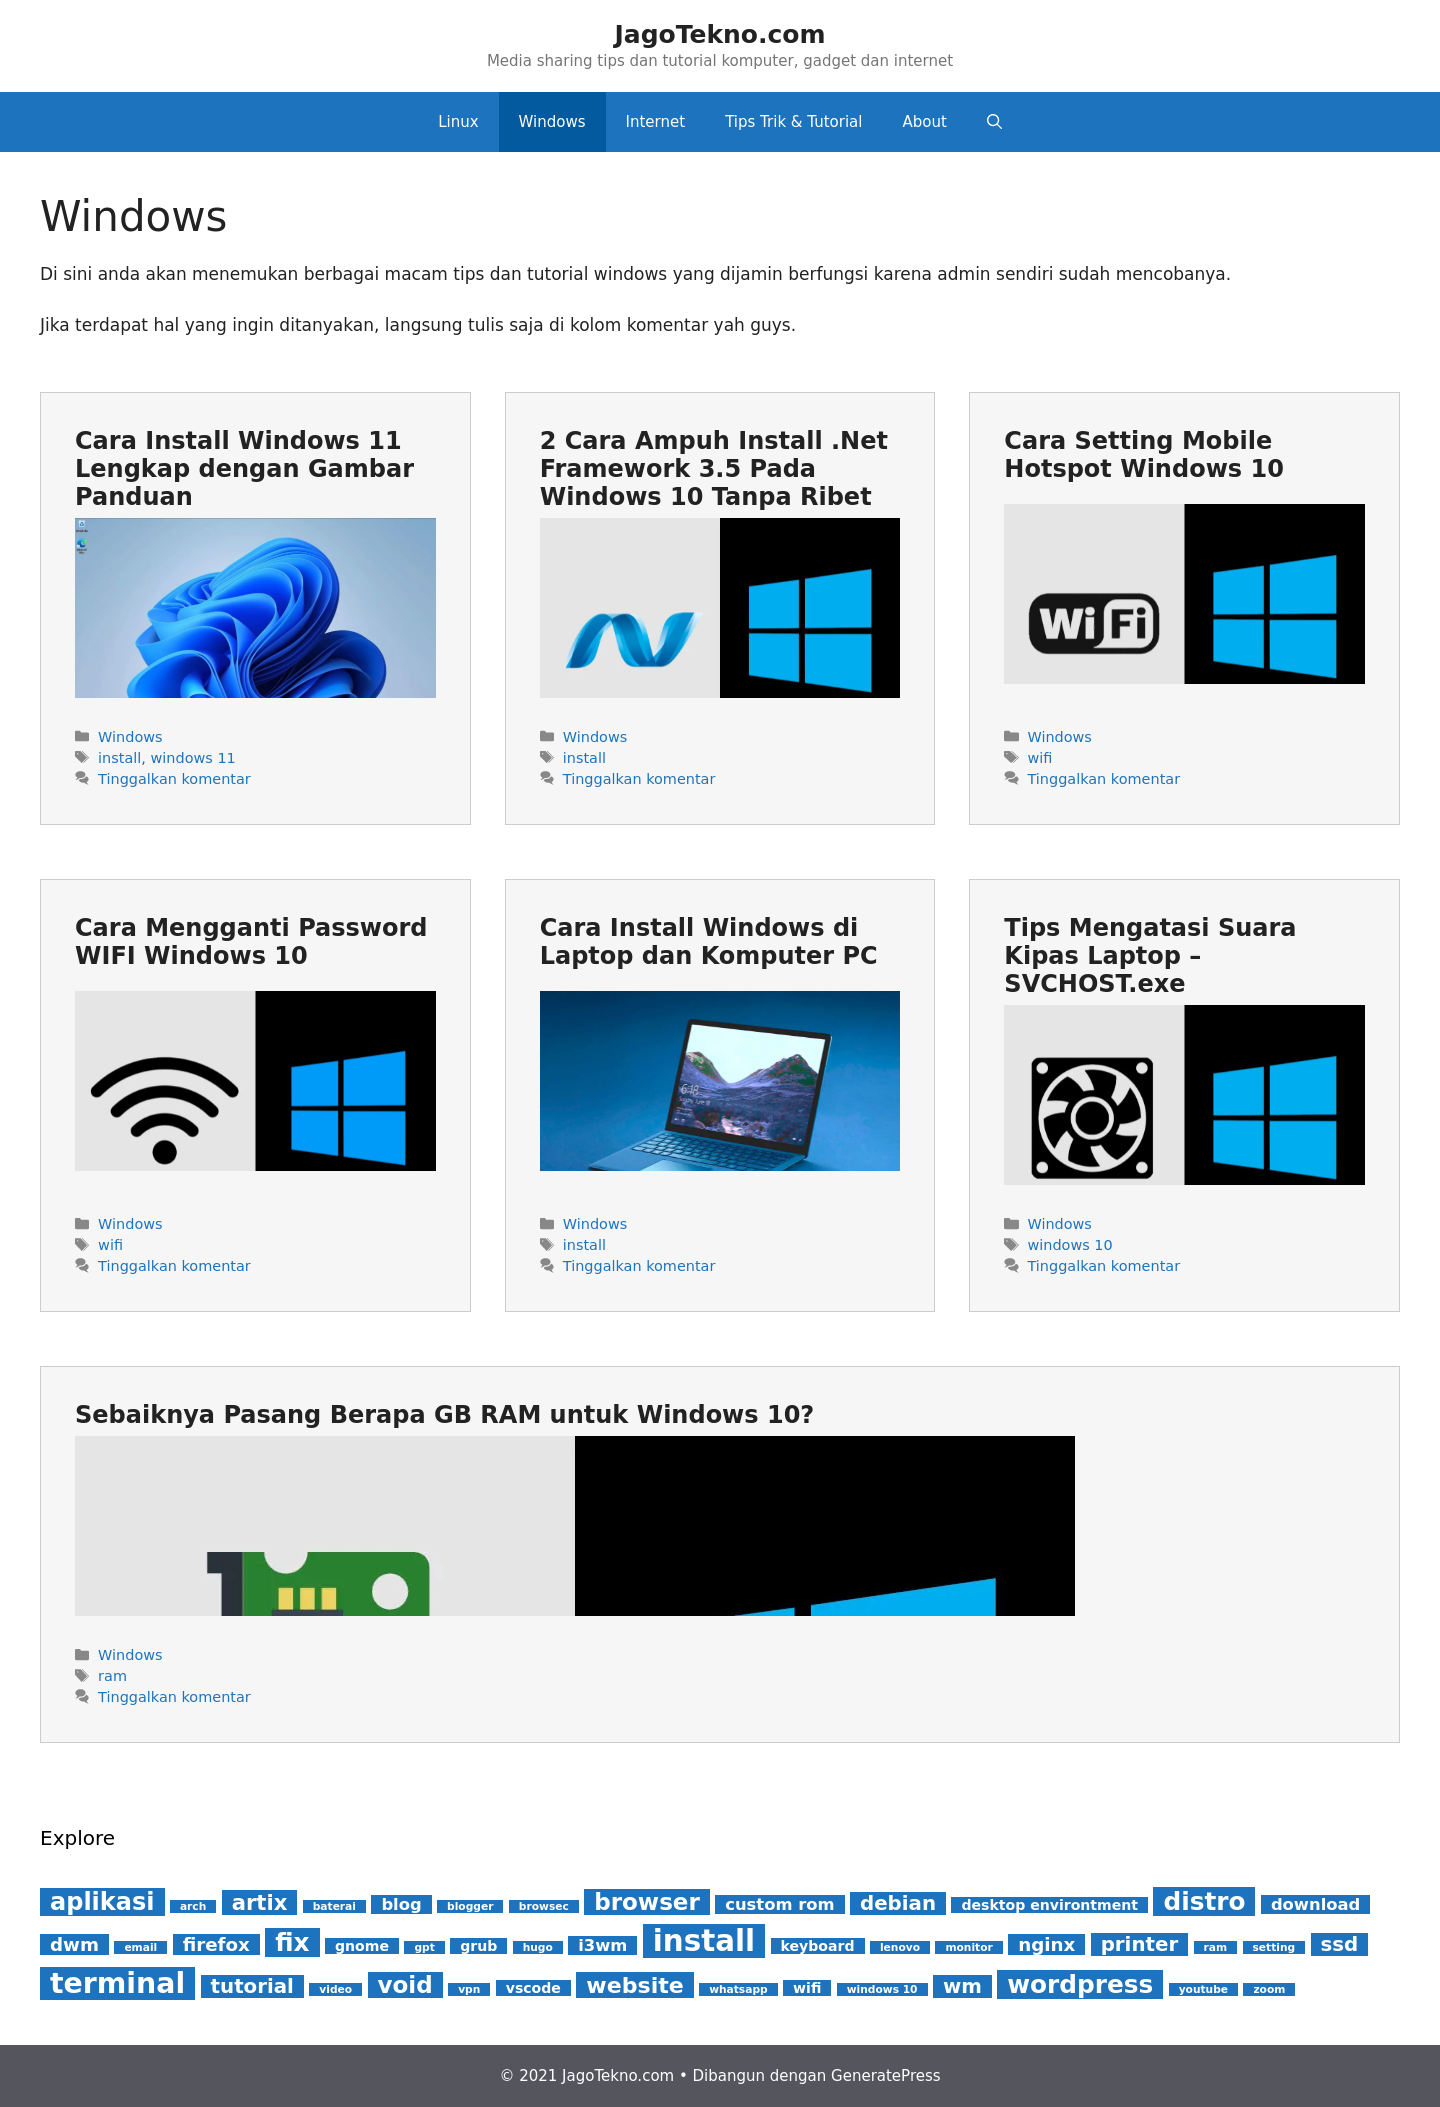
Salah satu layout atau tampilan yang paling sering ditanyakan adalah layout grid. Layout ini akan menampilkan postingan atau artikel pada halaman archive/index dalam bentuk cards.
Namun sayangnya untuk versi gratisnya Generatepress tidak menyertakan tampilan grid ini. Mau tidak mau kita harus mengubahnya secara manual.
Hasilnya bisa anda lihat pada tampilan blog JagoTekno pada saat ini.
Pada artikel ini saya akan membagikan bagaimana cara membuat tampilan layout grid pada generatepress theme di wordpress gratis dan tanpa plugin.
Intinya kita hanya akan mengubah/memodifikasi beberapa code file .php pada theme ini, setelah itu menambahkan script css pada pengaturan theme.
Hal pertama yang harus anda siapkan adalah:
- Memahami HTML dan CSS
- Membuat child theme Wordpress
- Sedikit pemahaman tentang penulisan PHP untuk beberapa elemen yang ingin dibuat.
- CSS yang digunakan adalah flexbox saja
Mari kita mulai.
Membuat child theme Generatepress
Pertama buatlah child theme Generatepress.
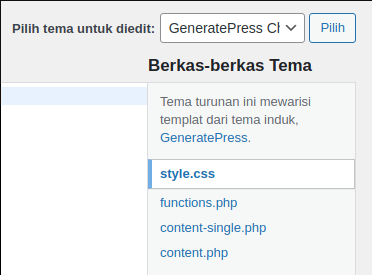
Setelah itu copy file content-single.php dan content.php dari parent theme Generatepress ke Child Theme Generatepress.
Sehingga hasilnya seperti ini.
Edit file content-single.php
Setelah file content-single.php ada di child theme, ganti isinya dengan code ini:
<?php
/**
 * The template for displaying single posts.
 *
 * @package GeneratePress
 */

if ( ! defined( 'ABSPATH' ) ) {
	exit; // Exit if accessed directly.
}
?>

<article id="post-<?php the_ID(); ?>" <?php post_class(); ?> <?php generate_do_microdata( 'article' ); ?>>
	<div class="inside-article">
		<?php
		/**
		 * generate_before_content hook.
		 *
		 * @since 0.1
		 *
		 * @hooked generate_featured_page_header_inside_single - 10
		 */
		do_action( 'generate_before_content' );

		if ( generate_show_entry_header() ) :
			?>
			<header class="entry-header">


				<?php
				/**
				 * generate_before_entry_title hook.
				 *
				 * @since 0.1
				 */
				do_action( 'generate_before_entry_title' );

				if ( generate_show_title() ) {
					$params = generate_get_the_title_parameters();

					the_title( $params['before'], $params['after'] );
				}

				/**
				 * generate_after_entry_title hook.
				 *
				 * @since 0.1
				 *
				 * @hooked generate_post_meta - 10
				 */

				?>

			</header>
			<?php
		endif;

		/**
		 * generate_after_entry_header hook.
		 *
		 * @since 0.1
		 *
		 * @hooked generate_post_image - 10
		 */
		do_action( 'generate_after_entry_header' );

		$itemprop = '';

		if ( 'microdata' === generate_get_schema_type() ) {
			$itemprop = ' itemprop="text"';
		}
		?>

		<div class="entry-content"<?php echo $itemprop; // phpcs:ignore -- No escaping needed. ?>>
			<?php

			the_content();


			wp_link_pages(
				array(
					'before' => '<div class="page-links">' . __( 'Pages:', 'generatepress' ),
					'after'  => '</div>',
				)
			);
			?>
		</div>

		<?php
		/**
		 * generate_after_entry_content hook.
		 *
		 * @since 0.1
		 *
		 * @hooked generate_footer_meta - 10
		 */
		do_action( 'generate_after_entry_content' );

		/**
		 * generate_after_content hook.
		 *
		 * @since 0.1
		 */
		do_action( 'generate_after_content' );
		?>
	</div>
</article>
Kemudian save.
Bonus, script di atas sudah saya modifikasi, sehingga tidak akan menampilkan meta data tanggal pada postingan dan hasil SERP Google. Itu kan yang kamu cari! Jika tidak, silahkan sesuaikan saja.
Edit file content.php
Selanjutnya buka dan edit file content.php yang sudah dicopy ke child theme sehingga isinya menjadi seperti ini.
<?php
/**
 * The template for displaying posts within the loop.
 *
 * @package GeneratePress
 */

if ( ! defined( 'ABSPATH' ) ) {
	exit; // Exit if accessed directly.
}
?>
<article class="jt-homeonly" id="post-<?php the_ID(); ?>" <?php post_class(); ?> <?php generate_do_microdata( 'article' ); ?>>
	<div class="inside-article">
		<?php
		/**
		 * generate_before_content hook.
		 *
		 * @since 0.1
		 *
		 * @hooked generate_featured_page_header_inside_single - 10
		 */
		do_action( 'generate_before_content' );

		if ( generate_show_entry_header() ) :
			?>
			<header class="entry-header">
				<?php
				/**
				 * generate_before_entry_title hook.
				 *
				 * @since 0.1
				 */
				do_action( 'generate_before_entry_title' );

				if ( generate_show_title() ) {
					$params = generate_get_the_title_parameters();

					the_title( $params['before'], $params['after'] );
				}

				/**
				 * generate_after_entry_title hook.
				 *
				 * @since 0.1
				 *
				 * @hooked generate_post_meta - 10
				 */
				do_action( 'generate_after_entry_title' );
				?>

			</header>

		<div class="jt-flex-content">

			<?php
		endif;

		/**
		 * generate_after_entry_header hook.
		 *
		 * @since 0.1
		 *
		 * @hooked generate_post_image - 10
		 */
		do_action( 'generate_after_entry_header' );

		$itemprop = '';

		if ( 'microdata' === generate_get_schema_type() ) {
			$itemprop = ' itemprop="text"';
		}

		if ( generate_show_excerpt() ) :
			?>

			<div class="entry-summary"<?php echo $itemprop; // phpcs:ignore -- No escaping needed. ?>>
				<?php the_excerpt(); ?>
			</div>

			</div>

		<?php else : ?>

			<div class="entry-content"<?php echo $itemprop; // phpcs:ignore -- No escaping needed. ?>>
				<?php
				the_content();

				wp_link_pages(
					array(
						'before' => '<div class="page-links">' . __( 'Pages:', 'generatepress' ),
						'after'  => '</div>',
					)
				);
				?>
			</div>

			<?php
		endif;

		/**
		 * generate_after_entry_content hook.
		 *
		 * @since 0.1
		 *
		 * @hooked generate_footer_meta - 10
		 */
		do_action( 'generate_after_entry_content' );

		/**
		 * generate_after_content hook.
		 *
		 * @since 0.1
		 */
		do_action( 'generate_after_content' );
		?>
	</div>
</article>
Kemudian save.
Edit CSS theme
Sekarang buka menu Tampilan » Sesuaikan » CSS Tambahan kemudian copy paste css berikut :
/* to display flex */
main {
    display: flex;
    flex-wrap: wrap;
    justify-content: space-evenly;
		gap:2em;
}
.jt-homeonly {
    flex: 1 1 390px;
}

.paging-navigation {
    flex-basis: 100%
}

.page-header {
    flex-basis: 100%;
}

.jt-homeonly h2 {
    font-size: 24px;
    font-weight: 700;
}

.jt-homeonly .inside-article {
    background: #efefef90;
    padding: 2em;
    border: 1px solid #ccc;
    height: 100%;
    display: flex;
    flex-direction: column;
    justify-content: space-between;
}

.jt-homeonly .inside-article:hover{
	background: none;
	transition:all .3s;
}

.jt-flex-content .post-image {
    max-height: 180px;
    overflow: hidden;
}

/* main css */
.widget-area .widget {
    padding: 0;
}
.site-content .content-area {
    width: 100%;
}
.is-right-sidebar {
    width: 30%;
}
.is-left-sidebar {
    max-width: 20%;
}

.widget_recent_entries ul li {
    border-bottom: 1px solid #eee;
    padding-bottom: 1em;
}
.widget_recent_entries ul li:last-child {
    border: none;
}
.entry-summary {
    color: #888;
		margin-top:0 !important;
		font-size:.8em;
		display:none;
}

span.byline {
    display: none !important;
}

a.wp-block-button__link {
    background-color: #1e73be !important;
}

a.tag-cloud-link {
    padding: 0 10px;
    background: #1e73be;
    color: #FFF;
		font-weight:700;
}
a.tag-cloud-link:hover {
    background: #1e73be90;
}

pre code {
    background: none;
}

code {
    background: rgba(0,0,0,.05);
    padding:3px;
		border-radius:3px
}

/* toc right sidebar only */
.inside-left-sidebar, .inside-right-sidebar {
    top: 0;
    position: sticky;
}
span.ez-toc-title-toggle {
    display: none;
}
ul.ez-toc-list.ez-toc-list-level-1 {
    font-size: .8em;
}
.ez-toc-widget-container ul.ez-toc-list li.active::before {
	background:none !important;
}

/* jt flex for content.php */
.jt-flex-content {
    /*display: flex;
		flex-wrap:nowrap;
		margin-top:2em;*/
}
.jt-flex-content .post-image {
    /*min-width: 50%;
    margin-right: 2em;*/
}


/* breadcrumb */
#breadcrumbs {
    font-size: 0.9em;
}

/* media screen */
@media only screen and (max-width:769px){
	main{
		display:block;
	}
	.jt-homeonly{
		width:auto;
	}
	.is-left-sidebar{
		display:none;
	}
	.is-right-sidebar{
		width:auto;
	}
	.jt-flex-content {
    flex-wrap:wrap;
	}
		.entry-summary {
		margin-top:2em !important;
	}
	.jt-homeonly .inside-article {
    border: none;
    padding: 0;
		background:none;
		margin-bottom:3em;
	}
}
Jangan lupa save.
Akhir kata
Sekarang anda sudah bisa mendapatkan tampilan grid layout pada theme GeneratePress anda gratis dan tanpa plugin.
Semoga postingan ini bermanfaat.
Rafi
- 15 year+ of Linux user.
- 5 years+ blogger and web developer.
Jika artikel yang dibuatnya ternyata bermanfaat, support dengan cara